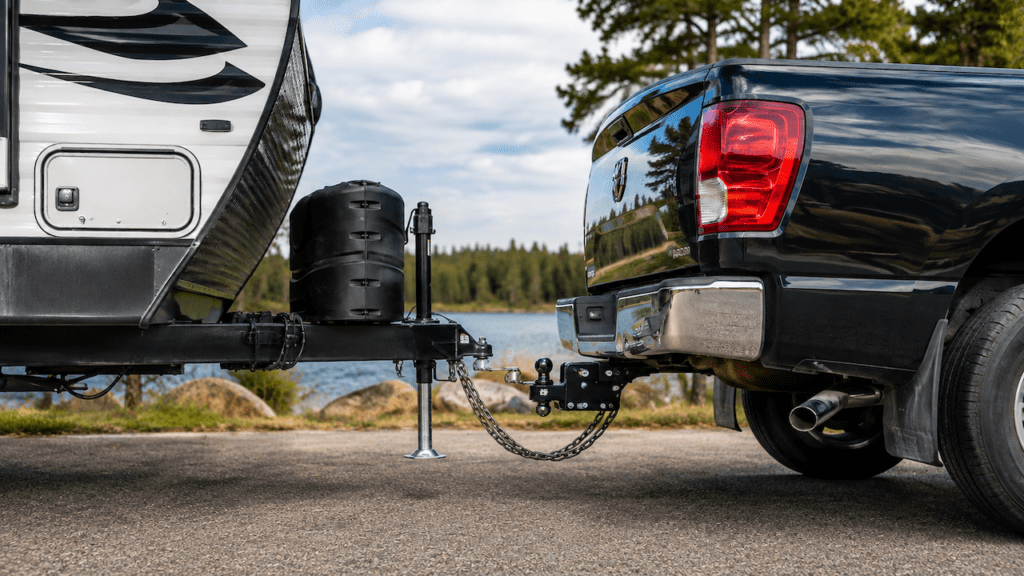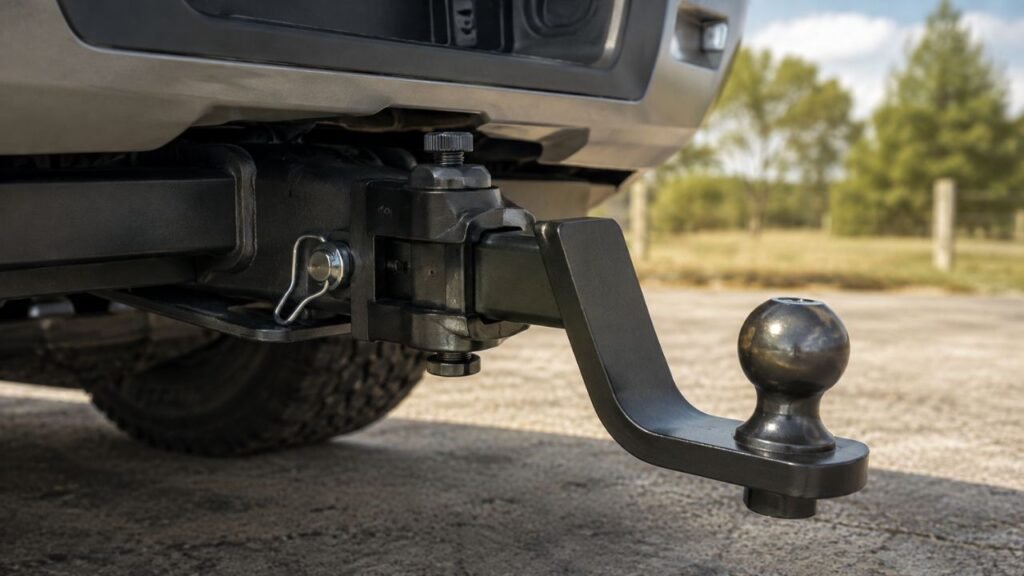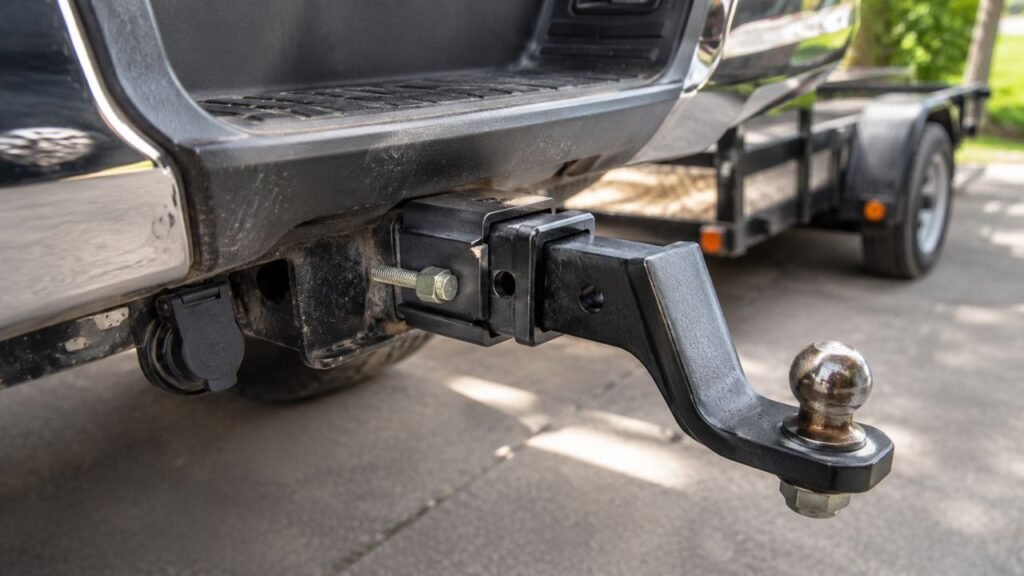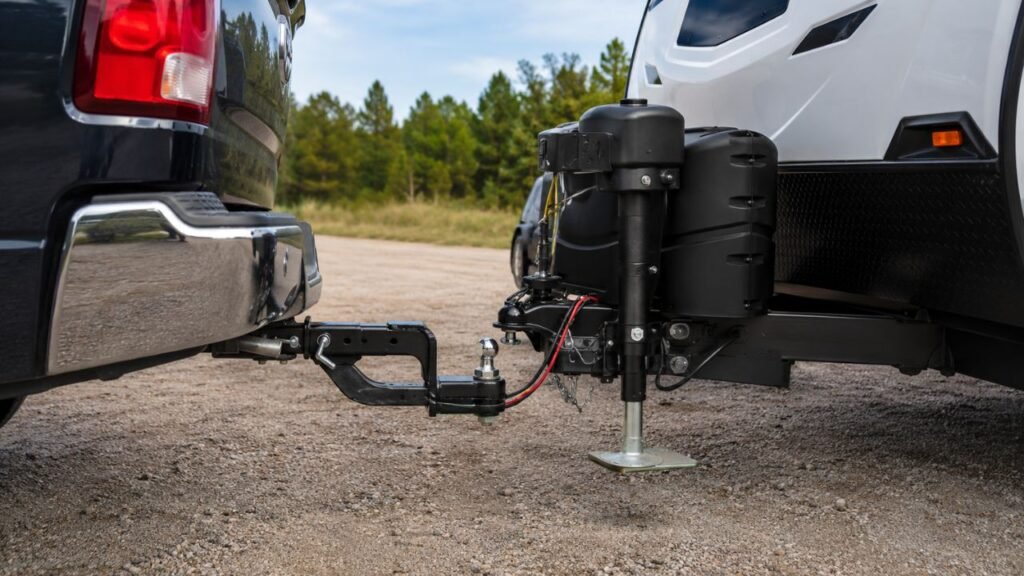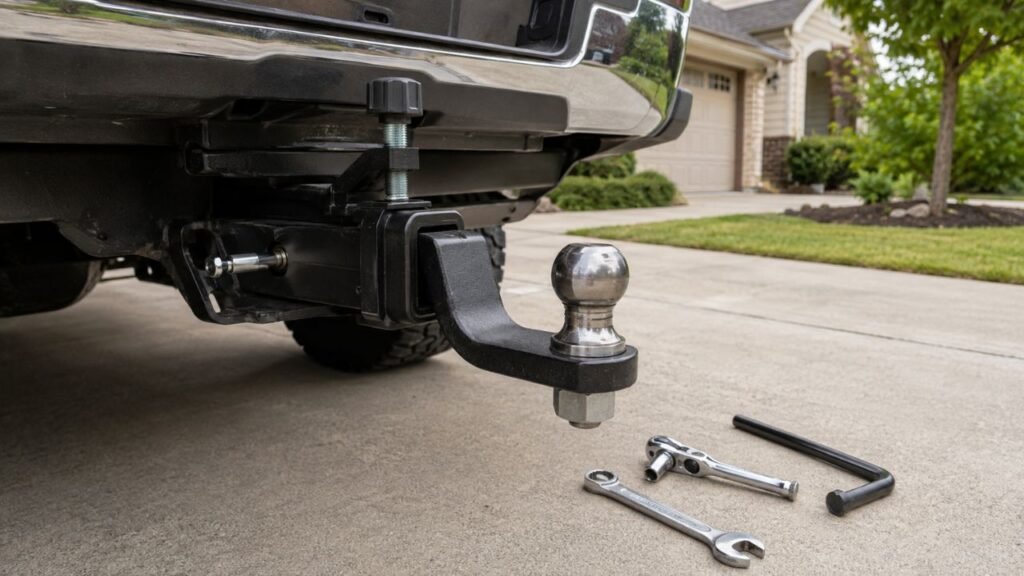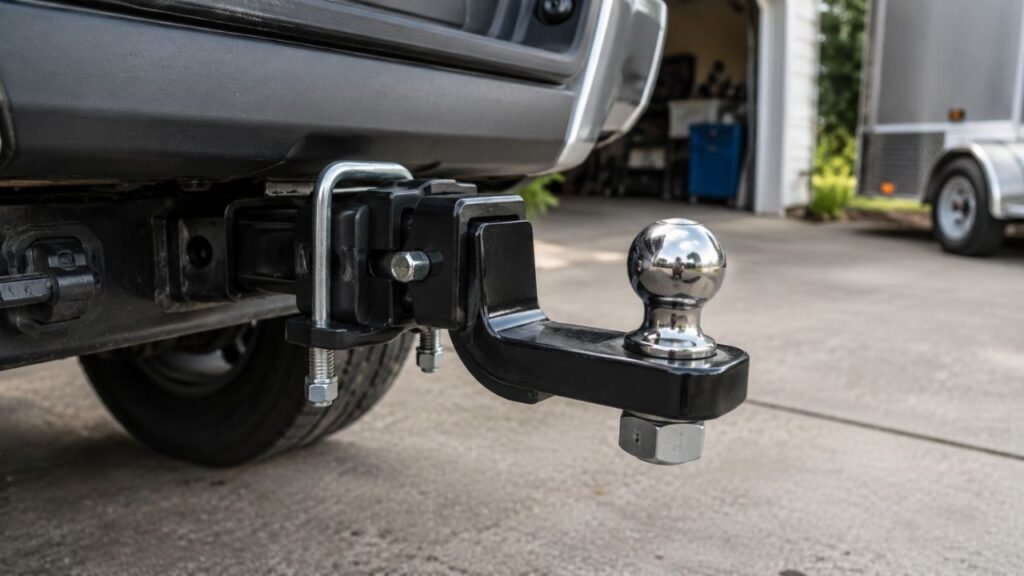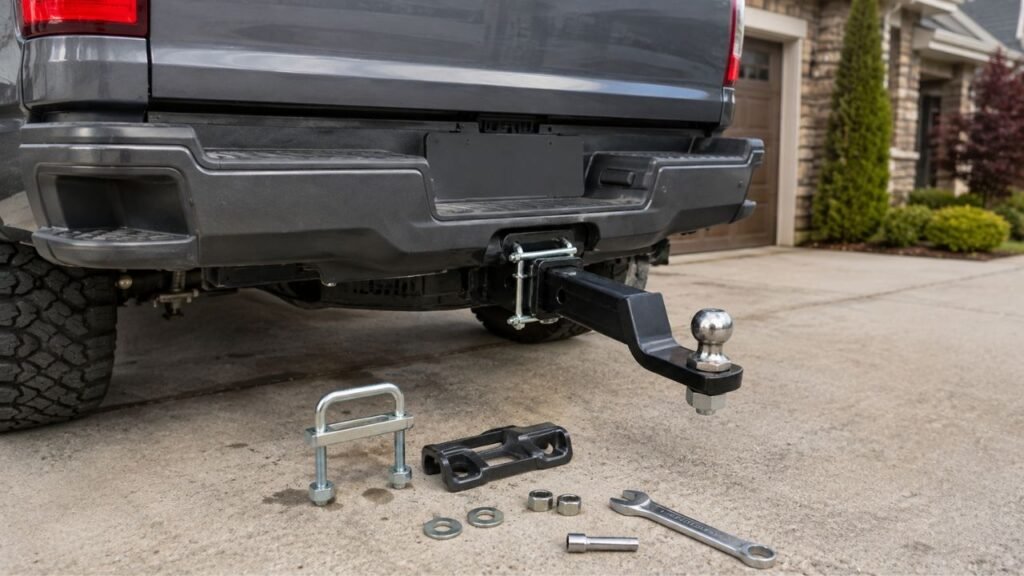
To install an anti-rattle hitch tightener, insert and secure your hitch accessory first. Then position the U-bolt and tightening plate near the receiver opening. Hand-tighten both nuts, then alternate between them with a wrench until unwanted hitch movement stops.
The process is simple, but positioning and tightening matter. I’ll walk you through installation, compatibility checks, common mistakes, and what to do if your hitch still rattles afterward.
Key Takeaways
- Secure your ball mount or hitch accessory before installing the tightener.
- Position the tightener close to the receiver and hitch-shank connection.
- Install the tightening plate according to your specific product instructions.
- Hand-tighten both nuts before using a wrench.
- Alternate between both sides while tightening the clamp.
- Never assume every hitch tightener uses the same torque specification.
- An external hitch tightener does not replace your hitch pin.
- Recheck the tightener after driving, especially on rough roads.
- Do not use a tightener to hide damaged hitch components.
What Do You Need to Install an Anti-Rattle Hitch Tightener?
Most anti-rattle hitch tighteners require only basic hand tools. Having everything nearby makes the installation much easier.
You will usually need:
- Anti-rattle hitch tightener
- U-bolt or supplied clamp
- Tightening plate
- Included washers
- Included nuts
- Proper hitch pin and clip
- Correct-size wrench or socket
- Torque wrench if your manufacturer specifies torque
- Flashlight for tight installation areas
- Work gloves if preferred
Check the hardware before starting. Some kits use flat washers, lock washers, or different nut designs.
Do not assume another tightener uses identical hardware. Always keep the supplied pieces together with that particular device.
Will the Anti-Rattle Tightener Fit Your Hitch?
Before tightening anything, make sure your device actually fits. Receiver dimensions and hitch accessories can differ more than expected.
| What to Check | What You Need to Know | Why It Matters |
| Receiver Size | Usually 1-1/4″, 2″, 2-1/2″, or 3″ | Tighteners are not universally sized |
| Hitch Shank | Solid or hollow | Some devices have specific compatibility |
| Hitch Class | Class I through V depending on product | Receiver construction and loads differ |
| Hitch Accessory | Ball mount, rack, carrier, or other accessory | Clearance can change between accessories |
| Reducer Sleeve | Check product instructions | Some tighteners cannot be used with sleeves |
| Weight Distribution Hitch | Confirm compatibility first | Not every clamp suits these setups |
| Ground Clearance | Check U-bolt position | Low receivers can create clearance problems |
| Receiver Shape | Standard or reinforced design | Welds and brackets may interfere |
The receiver size is the first thing I would check.
A tightener designed for a 2-inch receiver may not correctly fit a 2-1/2-inch setup. Likewise, some designs are made specifically for smaller 1-1/4-inch receivers.
Also inspect the area around the receiver opening.
Factory reinforcement plates, exhaust components, wiring, or bumper structures can sometimes interfere with clamp placement.
How Do You Install an Anti-Rattle Hitch Tightener Step by Step?
The following method applies to the common U-bolt-style anti-rattle tightener. Your plate shape, washer order, or torque requirements may differ slightly.
Step 1: Insert the Hitch Shank Into the Receiver
Start by installing your hitch accessory normally.
Slide the ball mount, bike rack, cargo carrier, or other shank fully into the hitch receiver.
Then align the hitch-pin holes.
Make sure the shank is seated correctly before adding the tightener. The clamp should stabilize a properly installed accessory, not force one into position.
Step 2: Install and Secure the Hitch Pin
Insert the correct hitch pin through both aligned holes.
Then install its retaining clip, lock, or securing mechanism.
This step is important because the hitch pin and tightener perform different jobs.
The hitch pin secures the accessory inside the receiver. The anti-rattle tightener mainly reduces unwanted movement between those components.
Never rely on an external tightener instead of your hitch pin.
Step 3: Position the U-Bolt Near the Receiver Opening
Place the U-bolt around the hitch shank near the receiver opening.
You generally want it positioned close to the point where the shank enters the receiver.
This lets the clamp pull the two components firmly together.
Before moving ahead, check nearby clearance.
The U-bolt should not interfere with your bumper, exhaust system, wiring, hitch pin, safety equipment, or other vehicle parts.
Step 4: Install the Tightening Plate Correctly
Slide the tightening plate onto both threaded ends of the U-bolt.
Position it against the receiver according to your product’s design.
Many plates have a lip, bend, raised section, or shaped surface. These features help the plate grip or brace against the receiver.
However, not every plate faces exactly the same direction.
That means you should not assume the raised edge always faces one particular way. Follow the orientation shown by your tightener manufacturer.
The plate should sit squarely rather than leaning sideways.
Step 5: Add the Washers and Nuts
Install the supplied washers over both threaded U-bolt ends.
Then thread the nuts on by hand.
Turn each nut several times, but do not tighten either side fully yet.
Different hitch tighteners use different washer arrangements.
Some may include flat washers and split lock washers. Others may use different locking hardware altogether.
Follow the hardware order supplied with your particular tightener.
Step 6: Hand-Tighten Both Sides Evenly
Start bringing both nuts toward the plate by hand.
Tighten one side slightly, then move to the other.
Continue until the plate contacts the receiver firmly.
Look at the plate from behind and from the side.
It should remain relatively straight and evenly positioned against the receiver.
If one side rises much faster, loosen it slightly and rebalance the clamp.
Step 7: Tighten Both Nuts Alternately
Now use your wrench or socket for final tightening.
Turn one nut slightly, then move to the other side.
Continue alternating between both nuts.
This helps pull the tightening plate evenly against the receiver instead of twisting it.
You should gradually notice the hitch shank becoming more stable.
Stop tightening once the unwanted receiver-to-shank movement has been properly controlled.
Do not keep applying force simply because you can.
Step 8: Check for Remaining Hitch Movement
Grab the hitch accessory and gently move it.
Check movement from side to side and vertically.
A correctly installed tightener should greatly reduce normal receiver play.
Then inspect the entire assembly.
Make sure:
- The hitch pin remains secured.
- The U-bolt remains correctly positioned.
- The tightening plate sits evenly.
- Both nuts have good thread engagement.
- Nothing contacts your bumper or exhaust.
- The hardware is not visibly bending.
- Ground clearance remains adequate.
If everything looks secure, your installation is complete.
Which Way Should the Anti-Rattle Hitch Tightener Face?
There is no single mounting orientation that applies to every anti-rattle tightener.
On common U-bolt designs, the clamp sits directly beside the receiver opening. The plate then pulls against the receiver while the U-bolt holds the hitch shank.
However, shaped plates can require a specific direction.
If your plate has a lip, curved edge, groove, or raised section, follow the manufacturer’s instructions rather than guessing.
Ground clearance can also affect orientation.
Some designs allow the U-bolt or plate to be mounted differently when space underneath the receiver is limited.
The important thing is proper contact, safe clearance, and correct manufacturer-approved positioning.
How Tight Should an Anti-Rattle Hitch Tightener Be?
Your anti-rattle hitch tightener should be snug enough to control unwanted movement without being excessively tightened.
There is no universal torque specification for every device.
One model may provide a specific torque value. Another may instruct you to tighten only until the connection becomes secure.
Use a torque wrench only when your manufacturer provides a torque specification.
Avoid choosing an arbitrary torque value from another product.
Excessive tightening can place unnecessary stress on the U-bolt, plate, nuts, receiver, or accessory shank.
If the hitch still moves after proper tightening, investigate the source instead of immediately applying more force.
Common Anti-Rattle Hitch Tightener Installation Mistakes
Most installation problems come from positioning or compatibility issues. Avoiding these mistakes can save plenty of frustration.
- Buying a tightener for the wrong receiver size
- Forgetting to install the hitch pin first
- Treating the tightener as a hitch-pin replacement
- Positioning the U-bolt too far from the receiver opening
- Installing a shaped tightening plate backward
- Using the wrong washer arrangement
- Fully tightening one nut before the other
- Overtightening the clamp unnecessarily
- Allowing the U-bolt to contact the exhaust
- Ignoring limited ground clearance
- Using an incompatible reducer sleeve
- Assuming every tightener fits weight-distribution equipment
- Clamping over damaged or severely rusted components
- Trying to eliminate movement coming from another connection
One mistake deserves extra attention.
An anti-rattle clamp should not be used to hide a damaged receiver.
If you see cracks, severe corrosion, enlarged hitch-pin holes, or distorted tubing, have the hitch inspected before towing.
How Can You Tell the Hitch Tightener Is Installed Correctly?
A correct installation should feel secure without stressing the hardware. Perform this short check before heading onto the road.
Look for these signs:
- Your hitch pin and retaining clip are fully installed.
- The hitch shank sits normally inside the receiver.
- Most receiver-to-shank movement has disappeared.
- The tightening plate sits flat and square.
- Both nuts have similar thread engagement.
- The U-bolt remains correctly positioned.
- Nothing contacts your bumper or exhaust system.
- No part of the clamp appears bent.
- Ground clearance remains safe.
- The assembly remains secure after a short drive.
I also recommend checking the tightener again after your first drive.
Rough pavement and vibration can reveal looseness that was not obvious while parked.
What If the Hitch Still Rattles After Installing the Tightener?
If the noise remains, do not immediately tighten the clamp harder. The rattle may actually be coming from another component.
The Tightener Is Not Seated Correctly
Start by inspecting the clamp itself.
A tilted plate, uneven nuts, loose hardware, or poorly positioned U-bolt can prevent proper clamping.
Loosen the hardware and reposition the assembly if necessary.
Then tighten both sides evenly again.
The Noise Is Coming From the Hitch Pin
The receiver connection may be tight while another component still moves.
A loose hitch pin or worn hitch-pin hole can sometimes create clicking or clunking noises.
Inspect both areas separately.
The Ball Mount or Receiver Is Excessively Worn
Older hitch components can develop more clearance over time.
Look for worn surfaces, elongated holes, heavy rust, cracks, or damaged receiver tubing.
A tightener cannot safely repair structural wear.
If the damage appears serious, replace or professionally inspect the affected component.
The Rattle Is Coming From the Trailer Coupler
Sometimes the receiver is blamed for noise coming from farther back.
Movement between the trailer coupler and hitch ball can create similar clunking sounds.
Check the ball, coupler latch, and coupler adjustment separately.
Your Bike Rack or Cargo Carrier Has Another Pivot Point
Bike racks and cargo carriers often contain several moving joints.
The receiver shank may be completely tight while folding hinges, trays, arms, or pivot points still wobble.
Inspect the entire accessory before blaming the hitch tightener.
You Are Using the Wrong Type of Anti-Rattle Device
Not every anti-rattle system works the same way.
Common options include:
- External U-bolt clamps
- Threaded anti-rattle hitch pins
- Internal wedges
- Hitch collars
- Anti-rattle shims
- Integrated accessory tightening systems
A different design may work better when your current clamp cannot address the movement source.
Can You Use a Hitch Tightener With a Bike Rack or Cargo Carrier?
Yes, many external anti-rattle hitch tighteners work with bike racks and hitch cargo carriers.
The important factor is compatibility between your receiver, accessory shank, and tightener.
Some bike racks already use threaded hitch pins or built-in anti-wobble mechanisms.
In those cases, installing another external tightener may provide little additional benefit.
Cargo carriers can benefit from extra stabilization because their weight sits farther behind the receiver.
However, the tightener only controls movement at the receiver connection.
Flex in the carrier platform itself will still remain.
Do You Need to Recheck an Anti-Rattle Hitch Tightener?
Yes. Hitch tighteners should be inspected periodically, especially when used frequently.
Vibration, road impacts, weather, and changing loads can affect hardware over time.
I recommend checking it:
- After the first short drive
- Before longer towing trips
- After driving rough roads
- After removing and reinstalling accessories
- When changing ball mounts
- Whenever hitch rattling returns
- During regular hitch inspections
Look at the U-bolt, nuts, washers, tightening plate, and surrounding receiver surfaces.
Rust or damaged threads can make the tightener harder to secure correctly.
Final Words
Installing an anti-rattle hitch tightener is usually straightforward. Secure your accessory first, position the clamp correctly, and tighten both sides gradually.
The biggest mistake is treating every tightener as identical. Plate orientation, washer arrangement, compatibility, and torque can vary between products.
Use the clamp to control normal receiver play, not compensate for damaged equipment. With the right setup, your hitch should feel noticeably tighter and quieter.
Related FAQs
Does an Anti-Rattle Hitch Tightener Replace the Hitch Pin?
No. A typical external anti-rattle tightener reduces movement between the hitch shank and receiver. Your hitch pin still secures the accessory inside the receiver and must remain properly installed.
Can I Install an Anti-Rattle Hitch Tightener Upside Down?
Some hitch tighteners allow alternate mounting when ground clearance is limited. However, this depends entirely on the product design, so follow your manufacturer’s approved mounting instructions.
How Tight Should the Nuts on a Hitch Tightener Be?
Tighten the nuts evenly until unwanted hitch movement is controlled. If your manufacturer provides a torque value, follow that specification rather than using a generic number.
Can You Overtighten an Anti-Rattle Hitch Tightener?
Yes. Excessive tightening can unnecessarily stress the U-bolt, plate, nuts, receiver, or accessory shank. Stop once the connection is properly stabilized.
Can I Use a Hitch Tightener on a 1-1/4-Inch Receiver?
Yes, if the tightener is specifically designed for a 1-1/4-inch receiver. Always confirm the stated receiver-size compatibility before purchasing or installing the device.
Does an Anti-Rattle Hitch Tightener Work With a Solid Shank?
Many external clamps can work with solid hitch shanks because they clamp externally. However, compatibility varies, so confirm your particular tightener supports the shank design.
Can I Use an Anti-Rattle Tightener With a Reducer Sleeve?
Sometimes, but not every anti-rattle device supports reducer sleeves. Check your tightener instructions because certain designs require direct contact with a specific receiver size.
Why Does My Hitch Still Move After Tightening the Clamp?
The clamp may be positioned incorrectly, insufficiently tightened, or incompatible with your setup. Movement can also originate from the hitch pin, coupler, accessory joints, or worn receiver components.
Should the U-Bolt Go Around the Receiver or Hitch Shank?
On many common U-bolt-style tighteners, the U-bolt surrounds the hitch shank near the receiver opening while the plate braces against the receiver. Always follow your product’s exact configuration.

Ryan Mitchell writes for readers who prefer independent travel and practical outdoor motorhome living. His how-to guides and reviews focus on simplicity, durability, and real value. He brings a calm, hands-on perspective to every topic.