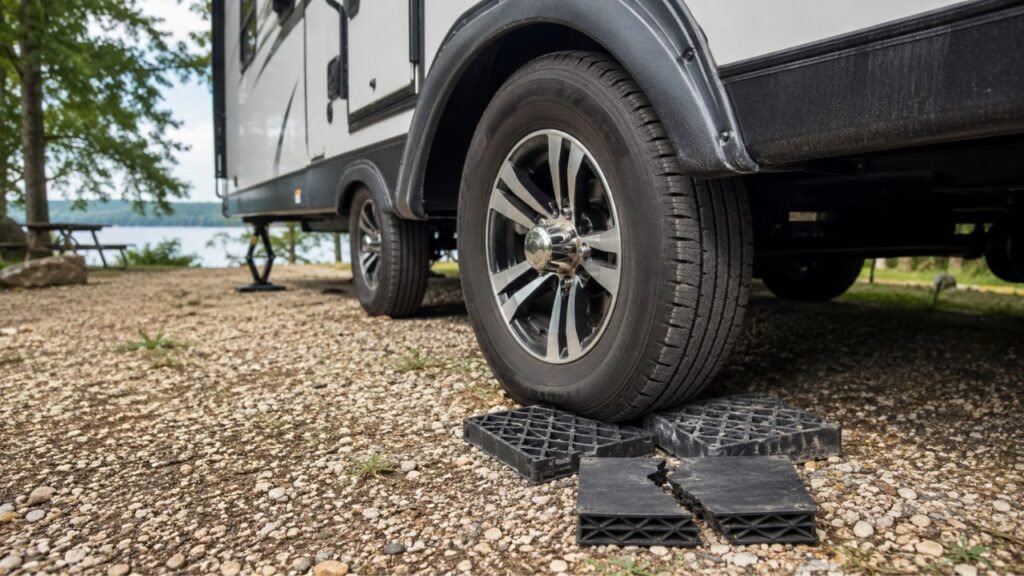
RV leveling blocks usually crack because the weight above them is not supported evenly. Sharp gravel, uneven ground, poor stacking, off-center tires, overloaded blocks, cold temperatures, or aging plastic can create concentrated stress that causes a block to bend, split, or break.
The good news is that cracking is often preventable. Below, I’ll help you figure out why your blocks are failing, what the crack pattern can tell you, and how to build a safer leveling setup next time.
Key Takeaways
- Uneven ground is one of the biggest causes of cracked leveling blocks.
- Small rocks underneath a block can create serious pressure points.
- Dirt between stacked blocks can prevent them from locking together properly.
- Tires and jack feet should stay centered over the supported area.
- Weight ratings may change depending on how blocks are stacked.
- Soft ground can shift after setup and stress the blocks.
- Cold and aging can make some plastic blocks easier to damage.
- A structurally cracked leveling block should usually be replaced.
- Rubber pads can help protect plastic blocks on rough surfaces.
- Always follow the instructions supplied with your specific blocks.
Why Do RV Leveling Blocks Crack?
Most leveling block failures come down to one basic problem: uneven loading. Your RV is heavy, but properly designed blocks can handle substantial weight when that force is spread across the surface correctly.
Rocks and Uneven Ground Create Pressure Points
This is probably the first thing I would check.
Imagine placing a plastic leveling block on a perfectly flat concrete pad. Most of the bottom surface can support the weight above it.
Now put the same block on a sharp piece of gravel.
Instead of the ground supporting the entire block, one small section may carry a large portion of the load. The plastic then bends around that high point.
That concentrated pressure can crack ribs, corners, or the center of the block.
This commonly happens on:
- Coarse gravel campsites
- Rocky boondocking areas
- Broken asphalt
- Tree roots
- Hard-packed ground with exposed stones
- Uneven concrete
I recommend looking underneath your blocks before loading them. A rock that seems insignificant can become a serious pressure point once thousands of pounds are involved.
Dirt or Gravel Gets Trapped Between Stacked Blocks
The ground is not the only surface that matters.
When you stack interlocking leveling blocks, the blocks need to sit properly against each other. Dirt, gravel, or small stones can keep one side from seating completely.
That leaves part of the upper block unsupported.
Once your tire moves onto the stack, the unsupported section may flex downward. Enough flex can eventually produce a crack.
Before stacking, give each block a quick shake or wipe.
It only takes a few seconds, and it can prevent unnecessary stress.
The Tire Is Not Centered on the Blocks
Your tire should sit securely over the usable portion of the leveling setup.
If the tire hangs over one side, the load becomes concentrated near the edge.
That is especially hard on lightweight plastic grid-style blocks.
Wide RV tires can create another problem. A narrow leveling block may not provide enough usable surface for the entire tread.
The same issue can appear with tandem axles when the blocks are positioned differently under each tire.
After driving onto the blocks, step outside and check the position.
You want the tire comfortably supported, not balancing near an edge.
The Jack Foot Is Loading One Edge
Not every leveling block is designed for every application.
A tire spreads its load across a reasonably large contact area. A jack foot may concentrate force across a much smaller surface.
If the jack lands partly on the edge of a block, the pressure becomes even more concentrated.
That can break corners or crush internal ribs.
Before putting blocks underneath leveling jacks, confirm that your particular blocks are approved for jack use.
Some products are designed primarily for tires. Others are specifically intended for jacks or landing gear.
You Are Exceeding the Block’s Actual Load Rating
A high advertised capacity can be reassuring, but you need to understand what that number actually means.
A weight rating might apply to:
- One individual block
- One complete stack
- A wheel
- An axle
- A jack
- A particular stacking arrangement
It does not necessarily mean you can place any part of your RV on any number of blocks.
Another mistake is comparing your RV’s total weight directly with the rating of one block.
Weight distribution between axles, wheels, jacks, and landing gear can be very different.
Check the manufacturer’s instructions for your exact product rather than relying only on the large number printed on the package.
The Blocks Are Stacked Incorrectly or Too High
Stacking blocks straight upward may look convenient, but it is not always the strongest arrangement.
Many interlocking blocks are designed to form a wider stepped or pyramid-style base.
That wider base spreads the load and reduces sideways movement.
A tall, narrow stack has much less stability.
The upper blocks can tilt, shift, or place unusual forces on the blocks underneath.
Also pay attention to maximum stacking height.
Do not assume that because the blocks physically connect, you can keep stacking indefinitely.
Follow the stacking pattern and height limits provided by the manufacturer.
The Ground Sinks After You Level the RV
Sometimes your setup looks perfect when you first park.
A few hours later, something changes.
Soft soil compresses. Gravel moves. Rain loosens the ground. Sand shifts beneath the blocks.
Once one corner sinks, the block may no longer sit flat.
The load above it stays heavy, but now the support underneath has changed.
That can twist or bend the block enough to cause cracking.
If you camp on soft ground, check the leveling setup again after the RV has settled.
I also like wider support pads for these situations because they spread the load across more ground.
Cold Weather Has Made the Material Less Impact-Tolerant
Plastic does not behave exactly the same at every temperature.
Some plastic materials become less impact-resistant as temperatures fall. That means a block that normally flexes slightly may be more likely to crack when loaded or struck in very cold conditions.
The exact temperature depends on the type and formulation of plastic.
So I would not assume every leveling block becomes unsafe at one specific temperature.
Instead, inspect your blocks more carefully during cold-weather camping.
Drive onto them slowly and replace any block that already shows stress cracks or brittleness.
Sunlight and Age Have Weakened Older Blocks
Leveling blocks live a hard life.
They get thrown into storage compartments, driven over, dropped on gravel, exposed to rain, and left sitting in direct sunlight.
Over time, the plastic can weaken.
Watch for:
- Faded surfaces
- Chalky plastic
- Small stress lines
- Broken ribs
- Brittle edges
- Permanent warping
Fading alone does not automatically mean a block is unsafe.
However, fading combined with cracks, brittle edges, or deformation deserves attention.
You Drove Onto the Blocks Too Aggressively
Your RV should move onto leveling blocks slowly.
Hard acceleration can make the tire hit the front edge instead of gradually climbing the stack.
The block may slide, twist, or receive a sudden impact.
Wheel spin is another problem.
A spinning tire can push blocks apart or damage their locking tabs.
Take your time.
Slow, controlled movement is much easier on your leveling equipment.
What Does the Crack Pattern Tell You?
The location of the damage can sometimes point you toward the cause. It will not prove exactly what happened, but it gives you a useful place to start looking.
| What You See | Possible Cause | What to Check |
| Cracked corner | Tire or jack positioned too close to the edge | Alignment and usable block width |
| Crack over one small area | Rock or raised ground underneath | Surface below the block |
| Broken locking tabs | Poor stacking or debris between blocks | Connections between stacked blocks |
| Several bottom blocks cracked | Uneven base or excessive loading | Ground condition and capacity |
| Block cracked after sinking | Soft or shifting soil | Ground support and base pad |
| Brittle-looking fractures | Age, cold, or previous damage | Overall block condition |
| Warped or bulging block | Excessive load or poor support | Rating, placement, and stacking |
The crack pattern is only a clue. Always compare the setup with the manufacturer’s instructions before deciding what caused the failure.
Why Did My Leveling Block Crack Even Though It Was Rated for My RV?
This can be frustrating. You check the weight rating, stay within the advertised number, and the block still breaks. The reason is usually that weight ratings assume the block is being used correctly.
Weight Ratings Don’t Always Mean the Entire RV Weight
Your RV’s total weight is not sitting on one leveling block.
Some weight is carried by one axle. Some is carried by another. On certain setups, landing gear or leveling jacks may temporarily carry substantial loads.
The actual force on one block can therefore be difficult to estimate from total RV weight alone.
Instead of guessing, use blocks designed for your type of RV and application.
Stacking Can Change the Rated Capacity
This is easy to overlook.
Some leveling products have different allowable loads depending on how they are stacked.
A single block might have one rating while two blocks stacked in a particular configuration have another.
That means you should not automatically multiply the single-block rating by the number of blocks in your stack.
Use the manufacturer’s stated capacity for the exact setup you are using.
Capacity Assumes the Block Is Used Correctly
Even an extremely strong block can fail if you load it incorrectly.
Weight ratings generally assume proper use.
They do not make the product immune to:
- Sharp rocks underneath
- Unsupported corners
- Sideways loading
- Incorrect stacking
- Excessive stack height
- Off-center jack feet
- Tires hanging over the edge
Think of load capacity as one part of the setup, not a guarantee against every type of failure.
Can I Keep Using a Cracked RV Leveling Block?
If the leveling block has a genuine structural crack, I would remove it from service.
A small cosmetic scratch is different from a crack that runs through a rib, corner, locking section, or load-bearing surface.
Do not rely on tape, glue, or placing the cracked block at the bottom of the stack. Once the structure has failed, you cannot be certain how it will behave the next time it carries weight.
Look especially closely for broken ribs, missing corners, damaged interlocks, large splits, or permanent deformation.
Replacing one block is much cheaper than dealing with an unstable leveling setup.
What Should I Do If a Leveling Block Cracks While My RV Is on It?
First, do not rush underneath the RV to inspect the broken block.
Keep people away from the affected side and make sure the RV cannot roll.
Then:
- Follow your RV’s instructions for safely unloading that wheel or jack.
- Retract or reposition leveling equipment as required.
- Move the RV off tire blocks slowly.
- Remove the damaged block only after the load is gone.
- Inspect the other blocks in the same stack.
- Check the ground for sharp rocks or sinking.
- Rebuild the setup correctly before loading it again.
Never depend on stabilizer jacks to lift an RV unless the manufacturer specifically says they are designed for that purpose.
Stabilizers and leveling jacks are not automatically the same thing.
How Can I Stop My RV Leveling Blocks From Cracking?
Preventing cracks mostly comes down to creating a flat, stable path for the load. Before you drive onto the blocks or extend a jack, spend a minute preparing the surface properly.
- Clear rocks, sticks, pinecones, and sharp debris.
- Choose the flattest available part of the campsite.
- Use a suitable wider base on rough or soft ground.
- Remove gravel caught between stacked blocks.
- Follow the manufacturer’s stacking pattern.
- Stay within the recommended maximum stack height.
- Make sure every block sits flat before loading.
- Center the tire over the usable block surface.
- Keep jack feet centered.
- Drive onto tire blocks slowly.
- Avoid spinning the tires.
- Inspect blocks before every setup.
- Remove damaged blocks from service.
- Store plastic blocks away from unnecessary sun exposure.
- Confirm the correct load rating for your application.
Most importantly, don’t ignore a setup that looks unstable.
If a block is rocking before your RV is on it, the situation will not improve once several thousand pounds are added.
Should I Put Rubber Pads Under Plastic RV Leveling Blocks?
A suitable heavy-duty rubber pad can be very helpful underneath plastic leveling blocks, particularly on gravel or rough ground.
The rubber creates a barrier between the plastic and sharp stones. It can also increase the contact area and help keep the blocks from sliding.
This does not mean any piece of rubber is appropriate.
Thin household mats may compress, tear, or move under heavy RV loads.
Use pads intended for heavy vehicle or RV support whenever possible.
You also need to keep the entire setup flat.
A rubber pad will not fix a badly tilted stack or an off-center tire.
Are Wood Blocks Better Than Plastic Leveling Blocks?
Both can work well when they are sized, maintained, and used correctly. I would choose based on your camping conditions rather than assuming one material is automatically stronger.
Plastic Leveling Blocks
Plastic blocks are popular because they are light, easy to clean, and simple to stack.
They also provide predictable height adjustments.
Their biggest weakness is sensitivity to poor support.
Sharp rocks, unsupported sections, age, and incorrect stacking can cause cracking.
Wood Boards
Wood gives you plenty of flexibility.
You can cut boards wide enough to support large tires and create a broad base on soft ground.
The disadvantages are weight and maintenance.
Wood can absorb moisture, warp, rot, or split over time.
If you use wood, inspect it regularly and avoid boards that are already cracked or rotten.
Heavy-Duty Rubber or Engineered Pads
Heavy-duty rubber pads are especially useful under jacks or underneath plastic blocks on rough surfaces.
They provide grip and help spread pressure across the ground.
However, ratings still matter.
A rubber pad should be designed to handle the loads involved.
What Should I Never Use Instead of RV Leveling Blocks?
Improvised supports can look strong until your RV’s weight is placed on them. Avoid materials that can unexpectedly crush, split, roll, or collapse.
- Hollow concrete or cinder blocks
- Loose rocks
- Bricks
- Firewood
- Rotten lumber
- Split boards
- Unrated household plastic
- Damaged leveling blocks
- Anything that rocks or shifts when you step on it
Your leveling setup is supporting a heavy vehicle.
This is not the place to experiment with questionable materials just because they happen to be nearby.
How Can I Tell My Leveling Blocks Are Starting to Fail?
Check your blocks while they are unloaded and easy to inspect.
Signs of possible failure include:
- Hairline cracks
- Broken grid ribs
- Missing corners
- Damaged locking tabs
- Permanent bending
- White stress marks
- Deep gouges
- Brittle edges
- Heavy surface deterioration
- Blocks that no longer sit flat
- Unusual cracking sounds while loading
If something looks questionable, compare it with a newer block.
The difference is often much easier to see side by side.
When Should I Replace RV Leveling Blocks?
There is no universal replacement schedule for every leveling block.
Some blocks may last many camping seasons. Others can be damaged during one bad setup.
I would replace a block when it has a structural crack, broken support rib, damaged locking system, missing section, or permanent deformation.
You should also replace blocks when the manufacturer specifically recommends removing them from service.
Before throwing a failed block away, check whether your product has a warranty.
Just remember that a replacement block will not solve the problem if the original failure came from uneven ground or poor stacking.
Correct the cause too.
A Better Leveling Routine for Rough Gravel Campsites
Gravel sites are where I would spend a little extra time before leveling. A few minutes of preparation can save your blocks and give your RV a more stable foundation.
Step 1: Choose the Smoothest Part of the Site
You do not always have to level the RV exactly where you first stop.
Look around the campsite.
Moving forward or backward a few feet may give you a much smoother surface.
Step 2: Remove High Rocks and Debris
Clear away sharp stones, branches, pinecones, and anything else that creates a raised point.
Pay extra attention to the area underneath the corners of your blocks.
You want the base sitting as evenly as possible.
Step 3: Add an Appropriate Base if Needed
Loose gravel, sand, mud, and soft soil may need more surface area.
A suitable rubber pad or wide load-supporting base can help spread the weight.
This also protects plastic blocks from direct contact with sharp gravel.
Step 4: Build the Stack According to Its Instructions
Create the stack using the pattern recommended for your blocks.
If the product uses interlocking pieces, make sure each connection is fully seated.
Do not create a tall, narrow tower just because the blocks physically connect.
Step 5: Check Tire Alignment
Before driving up, look at where the tire will finish.
The tread should remain supported by the usable area of the block.
If the tire is wider than your setup, adjust it before loading.
Step 6: Load the Blocks Slowly
Drive onto the stack using very gentle throttle.
Stop if the blocks slide, separate, tilt, or make concerning sounds.
Backing off and rebuilding the stack is much safer than forcing the RV farther onto a bad setup.
Step 7: Inspect the Setup Once Loaded
After parking and securing the RV, visually inspect the blocks from a safe position.
Check for:
- Tilting
- Sinking
- Tire overhang
- Separated blocks
- Cracks
- Uneven ground contact
Do not crawl underneath the RV just to inspect a block.
Final Verdict
If your RV leveling blocks keep cracking, don’t immediately assume you simply need stronger blocks.
The real problem is often how the weight is reaching the block.
A high-quality leveling block can still fail when it sits on one sharp rock, supports an off-center tire, rests on unstable soil, or is stacked incorrectly.
Start by improving the foundation.
Clear the ground, build the stack correctly, center the load, and stay within the manufacturer’s limits.
Those simple habits can dramatically reduce the chance of hearing that unpleasant cracking sound during your next setup.
Related FAQs
Can RV Leveling Blocks Crack on Gravel?
Yes. Gravel can create concentrated pressure points beneath a leveling block, especially when large or sharp stones prevent the block from sitting flat. Clearing the surface or using a suitable support pad can help distribute the load more evenly.
Can Cold Weather Crack Plastic RV Leveling Blocks?
Cold weather can make some types of plastic less impact-resistant, increasing the chance of cracking under heavy loads or sudden impact. The effect varies by material, so follow the temperature recommendations for your particular blocks.
Can I Use a Cracked Leveling Block One More Time?
I would not use a structurally cracked leveling block under your RV. Once a rib, corner, locking tab, or load-bearing surface has failed, its remaining strength is uncertain and replacement is the safer option.
How High Can I Stack RV Leveling Blocks?
There is no single safe stacking height for every product. Follow the maximum height and stacking pattern specified by the manufacturer because allowable height and load can change between different leveling block designs.
Can I Put Leveling Blocks Under RV Jacks?
You can use blocks underneath RV jacks only when those blocks are designed and rated for that application. A jack foot concentrates weight differently than a tire, so don’t assume every tire leveling block is suitable.
Why Does Only the Bottom Leveling Block Keep Cracking?
When the bottom block repeatedly cracks, inspect the ground first. Sharp gravel, uneven pavement, sinking soil, or a high point underneath the block can place much more stress on the bottom layer.
Should RV Tires Be Centered on Leveling Blocks?
Yes. Keeping the tire centered helps distribute the load over the intended support area. A tire hanging over the edge can put excessive stress on one side and increase the chance of cracking or shifting.
Are Rubber RV Leveling Pads Better Than Plastic Blocks?
Rubber pads and plastic blocks serve slightly different purposes. Rubber offers grip and good ground contact, while plastic blocks are convenient for adding height. The better choice depends on the surface, required lift, load capacity, and your leveling system.

Ryan Mitchell writes for readers who prefer independent travel and practical outdoor motorhome living. His how-to guides and reviews focus on simplicity, durability, and real value. He brings a calm, hands-on perspective to every topic.